
Build with AI Like a Professional Engineering Team
Production-quality apps with a professional AI engineering team by your side


The AI software slop problem
You’ve seen it. Maybe you’ve done it. Open a coding agent, type “build me a SaaS app,” and watch it spit out 2,000 lines of code in twelve seconds. It compiles. It even runs. You ship it.
Three weeks later you’re debugging why the auth middleware silently skips validation on expired tokens. The database queries have no error handling. There are hardcoded API keys in config files. The tests, if they exist, test that functions return something, not that they return the right thing. Nobody reviewed the architecture because there was no architect. Nobody caught the security holes because there was no security review. Nobody checked if the code actually matched the spec because there was no spec.
This is the AI software slop problem. The code looks professional. It reads like professional code. But it was written by a single agent working in isolation with no oversight, no review gates, and no engineering process. It’s the software equivalent of a kid copying homework, the answers look right until you check the working.
The fix isn’t better prompts. The fix isn’t a smarter model. The fix is the same thing that stopped human developers from shipping garbage: process and specialisation. You need an engineering team, not a code fountain.
In my tests, the same issue exists no matter what coding agent or model you use. I tried building fairly sizable projects using Claude Code and Opus 4.6, Codex and GPT-5.4 or GPT-5.3-codex. I tried OpenCode with Kimi-K2.5, Minimax-M2.7 and Droid Agent with GLM-5.1. Some agents a marginally better than others because they have an in-built harness. However, until you really sit down and map what needs to happen from an engineering delivery and quality assurance point of view, you’re just a kid with crayons painting pretty pictures that are completely unmaintainable. Great for an MVP or testing an idea, but not great for delivering production grade software.
This harness and approach changes that.
The Basic Idea
Professional software teams don’t work the way most people use AI coding agents.
In a real team, you have an architect who designs the system and writes Architecture Decision Records, but never writes implementation code. You have a planner who breaks features into phased delivery plans with exact file paths and dependencies. You have developers who write code test-first and refuse to touch files outside their scope. You have code reviewers who catch what the developer missed. You have a security reviewer who runs OWASP Top 10 checks and issues a BLOCK/WARN/PASS verdict. You have a TDD (Test Driven Development) guide who enforces red-green-refactor. You have a database reviewer, an E2E test runner, a refactoring specialist.
Each role has a narrow, well-defined responsibility. Each role has hard boundaries, things it will not do. The architect never writes code. The security reviewer never edits files. The developer never adds helpers that aren’t in the spec.
What if you could give your AI coding agent the same structure?
That’s what ai-dev-harness does. It’s an open-source framework that installs a complete set of agent profiles, skills, lifecycle policies, and working rules into your project. Your coding agent doesn’t just write code, it works within an engineering system that keeps the code honest.
Why This Setup and What You Get
The harness gives you three things that solo AI coding doesn’t:
1. Agent profiles with hard boundaries. Fourteen specialist roles, each with explicit permissions and restrictions. The architect reads code and produces ADRs, its tool access is limited to read, grep, and glob. The code-agent writes code and runs tests, but must declare a scope boundary before touching anything. The security-reviewer scans for vulnerabilities and produces a structured report with a verdict, but never edits a file. The planner creates phased implementation plans with exact file paths, but never writes code. These aren’t soft suggestions, they’re enforced by the agent’s tool configuration and written into each profile’s “What NOT to Do” section.
2. Skills that encode engineering practices. Eighteen skills covering the full development lifecycle: api-design, backend-patterns, frontend-patterns, database-migrations, deployment-patterns, docker-patterns, security-review, e2e-testing, tdd-workflow, verification-loop, coding-standards, golang-patterns, python-patterns, postgres-patterns, and more. Each skill activates contextually, the tdd-workflow skill triggers when writing new features or fixing bugs, the verification-loop skill triggers after completing significant changes, the security-review skill triggers when handling auth or data protection.
3. A lifecycle policy that routes work to the right agent. A TOML configuration maps ticket types to specialist profiles. A new feature goes to the code-agent. A code quality gap goes to the code-reviewer. A security concern goes to the security-reviewer. A database change goes to the database-reviewer. You don’t have to remember which agent does what, the harness routes it automatically.
Together, these three layers mean your AI agent works within a system and has standards to follow, review gates to pass, and specialist roles to lean on. The result is code that survives contact with production, because it was built like production code.
The Architecture Principles Every Project Starts With
Before you write a single line of code, before you even spec out a feature, there are principles that should be baked into every solution. These aren’t optional. They’re not “nice to haves” you add later. They’re the difference between a system that works and a system that keeps working.
The harness encodes these into its agent profiles, skills, and working rules. But even if you never use the harness, these are the non-negotiables. Print them out. Stick them on the wall. Reference them in every code review. If your project violates one of these, you need a damn good reason documented in an ADR.
1. Modularity, single responsibility, high cohesion, low coupling. Every file does one thing. Every function does one thing. If you can’t describe what a file does in one sentence, it does too much. Target 200-400 lines per file. Hard stop at 800. When a file crosses 800 lines, it’s telling you it has too many responsibilities. Split it.
2. Explicit error handling, no silent failures, ever. Every async call has error handling. Every external dependency call has a try/catch or equivalent. No silent catch blocks. No swallowing errors and continuing. If something fails, the system knows it failed, logs it, and responds appropriately. A silent failure is a lying system. Lying systems kill people’s data.
3. Input validation at boundaries. Validate all external input at the system boundary, API endpoints, message consumers, file parsers, before it reaches business logic. Internal code trusts internal data. External code trusts nothing. This is where injection attacks live. Validate early, validate once, validate completely.
4. Immutability by default across async boundaries. Shared mutable state across async boundaries is a bug factory. Data that crosses an async boundary should be immutable, copied, not referenced. If two concurrent processes can modify the same object, you will get race conditions. Not maybe. Will.
5. Security, defense in depth, least privilege. Authentication on every protected route. Authorization checked on every operation. No hardcoded secrets, all config via environment variables. No PII in logs. Errors sanitized before reaching clients. Security is not a layer you add at the end. It’s a constraint you design for from the start.
6. Stateless services where possible. Design for horizontal scaling from day one. If your service holds session state, it can’t be scaled by adding instances. Push state to the client or to a dedicated state store. Stateless services are easier to deploy, easier to scale, easier to recover. Design for 10x before needing 100x.
7. API contracts before implementation. Define your API surface first: method, path, request body, response body, auth requirements, error responses. Write it down. Share it. Build against it. This is the contract between your frontend and backend, between your services, between your team. If the contract is wrong, the implementation doesn’t matter.
8. Test-driven development, tests before code, always. Write failing tests that describe the expected behaviour. Then write the minimum code to make them pass. Then refactor. Red-green-refactor. Every time. No exceptions. Target 80% coverage on branches, functions, and lines. If coverage is below threshold, write more tests, never lower the threshold.
9. Phased delivery, each phase independently mergeable. Break work into phases that can ship on their own. M0: repo and infrastructure. M1: foundation. M2: features. M3: quality and operations. If a phase can’t be merged without the next phase, the plan is wrong. This isn’t bureaucratic, it’s how you keep the blast radius of any bug bounded.
10. No hardcoded values, config is external. API URLs, feature flags, timeout values, retry counts, rate limits, these change between environments. Hardcode them and you’re deploying code to change a timeout. Externalize them and you’re editing a config file. Every magic number in your codebase is a deployment risk.
11. Consistent patterns over clever solutions. When the existing codebase uses a pattern, use that pattern. Don’t introduce a “better” approach that only you understand. Consistency beats cleverness every time. If the pattern is genuinely wrong, write an ADR, get agreement, then change the pattern everywhere. Don’t leave two patterns coexisting.
12. Logging, security-sensitive operations are always logged. Auth attempts, permission changes, data access, payment operations. If it’s security-sensitive and it’s not logged, you have no forensics when something goes wrong. Log the operation, the actor, the timestamp, and the outcome. Not the sensitive data itself, the fact that the operation happened.
13. Dependency management, know what you depend on. Run dependency audits regularly. No high or critical CVEs in your dependencies. Pin your versions. Know what each dependency does and why it’s there. A dependency you don’t understand is a supply-chain attack vector you can’t defend against.
14. Documentation stays in sync with code. Stale documentation is worse than no documentation, it’s actively misleading. When code changes, docs change. README, API docs, ADRs, runbooks, all of it. The doc-updater profile exists because this is hard for humans. It’s harder for AI agents, which will happily implement a feature and forget the README exists.
15. Design for failure. Every external call will fail. Every database will have slow days. Every third-party API will timeout. Design for it. Circuit breakers, retries with backoff, fallback responses, graceful degradation. If your system assumes the network is reliable, the network will teach you otherwise.
These fifteen principles are the starting point. Not the ending point, you’ll add domain-specific principles as you learn more about your problem. But if your project violates any of these, the violation should be intentional, documented, and justified. Not accidental.
The harness doesn’t just suggest these, it enforces them through agent constraints, skill workflows, and review gates. But even without the harness, this list is your pre-flight checklist. Run through it before every project. Run through it during every review gate. If something’s missing, fix it before you ship.
Step 1: Install and Configure Your Coding Agent
Pick your coding agent. I use Factory’s Droid, but this setup works with Codex, Claude, or any agent that can read a repo and follow instructions. The harness is agent-agnostic, it’s a set of files and conventions, not a vendor lock-in.
Install your agent’s CLI and make sure it can read files, write files, run shell commands, and grep your codebase. That’s the baseline. If your agent can do those four things, the harness works.
Don’t skip the shell access. Half the value of this system comes from running tests, builds, and security scans. If your agent can’t execute commands, you lose the verification-loop skill, the security-reviewer’s automated scans, and the TDD workflow. You’re left with a very expensive syntax highlighter.
Step 2: Initialise Your New Project Folder
Create your project directory and point your coding agent at the harness repo. The harness bootstraps your project with:
.agents/profiles/, the fourteen specialist roles
.agents/skills/, the eighteen engineering practice skills
lifecycle-policy.toml, ticket-type-to-agent routing
AGENTS.md, working rules, conventions, and coding standards
CODEX_INITIAL_PROMPT.md, the initialisation and phased delivery model
The initialisation prompt (in the Prompt Library below) tells the agent to read the entire harness repo, follow the setup instructions, install dependencies, create a GitHub repo, and then learn all the agent roles and skills. This is not a quick step, it takes a few minutes. Let it run. The agent is reading every profile, every skill, every working rule. It’s building a mental model of your engineering team.
Once initialised, your project has a structure that any coding agent can pick up and work within. The rules live in the repo, not in your head.
Step 3: Enable Your Engineering Team to Do Work
This is where it gets real. The harness defines fourteen specialist profiles. Here’s what each one does and why it matters:
Architect, Read-only. Gathers evidence before recommending. Produces Architecture Decision Records with explicit trade-off analysis (Pros/Cons/Alternatives/Decision with single clear rationale). Never writes implementation code. The architect exists to stop you from jumping straight to coding without understanding the problem.
Planner, Read-only. Breaks features into independently deliverable phases with exact file paths, dependencies, complexity estimates, and testing strategy. Each phase must be mergeable on its own. The planner catches “update the API” vagueness and forces specificity: which file, which function, which endpoints.
Code Agent, The implementer. Executes one scoped ticket at a time. Must declare assumptions, scope boundary, and what it’s not building before touching any files. TDD process: write failing tests, implement minimum code, run quality gates, fix failures, commit. Never touches files outside scope. Never adds helpers not in the spec.
Code Reviewer, Read-only. Reviews code for quality, patterns, and consistency. Catches what the code agent missed.
Security Reviewer, Read-only. Runs automated scans for hardcoded secrets, dependency vulnerabilities, SQL injection patterns, and sensitive data in logs. Then does a manual OWASP Top 10 review on changed code. Produces a structured report with BLOCK/WARN/PASS verdict. Any CRITICAL or HIGH finding blocks the phase.
TDD Guide, Writes failing tests before implementation exists. Enforces red-green-refactor. Requires 80% coverage on branches, functions, and lines. If coverage is below threshold, writes more tests, never lowers the threshold.
Database Reviewer, Reviews schema changes, migration safety, and query patterns.
E2E Runner, Runs end-to-end test suites (Playwright) covering critical user flows.
Doc Updater, Keeps documentation in sync with code changes.
Refactor Cleaner, Removes duplication, improves naming, reduces file sizes. Targets 200-400 lines per file, hard stop at 800.
Build Error Resolver, Fixes build failures and CI pipeline issues.
Go Build Resolver / Go Reviewer, Go-specific build and review specialists.
Python Reviewer, Python-specific review with pattern enforcement.
The key insight: each profile has a “What NOT to Do” section. These boundaries are what make the system work. Without them, every agent turns into the same generic code generator.
Step 4: Create Your First Feature or Build Spec
Now you use the “Spec Out” prompt from the Prompt Library. You tell the agent what you want to build and it produces two things: a production-ready build spec and a phased checklist roadmap.
The build spec covers architecture decisions, data models, API contracts, error handling strategy, and security considerations. It follows the harness standards, modularity (single responsibility, 200-400 lines per file), explicit error handling (no silent catches), input validation at boundaries, immutability by default across async boundaries.
The checklist roadmap breaks the work into independently deliverable phases: M0 (repo activation and infrastructure), M1 (foundation, core models and base endpoints), M2 (product core, feature implementation), M3 (quality and operations, security hardening, E2E tests, monitoring). Each phase has clear success criteria and can be merged on its own.
Here’s the important part: the prompt asks the agent to ask you up to 30 questions, one by one, to clarify anything uncertain before building starts. This pattern is deceptively powerful. It forces the AI to extrapolate on solution components you haven’t thought about, authentication strategy, error surface area, data migration paths, rate limiting, cache invalidation. It’s like having a senior engineer sit next to you and say “have you considered what happens when the payment provider times out?” before you write a single line of code.
Don’t skip the 30 questions. This is where the harness earns its keep. The agent has read all the profiles and skills, it will surface concerns that the architect profile would raise, security issues the security-reviewer would catch, edge cases the TDD guide would test for. Answer the questions. Lock in the assumptions. Then build from a position of certainty to create a much better quality solution.
Step 5: Create Quality Validation Gates for Every Phase
Every phase of your checklist roadmap needs a review gate. The “Add a Review Gate” prompt in the Prompt Library appends a verification step to each phase that the agent cannot skip past.
The review gate does three things: compares the code developed in that phase against the build spec, identifies any functionality gaps, and closes them. It enforces 80% test coverage minimum. The phase cannot be called complete until the gate passes.
This is the single most important step in the entire process. Without review gates, AI agents drift. They forget parts of the spec. The review gate forces the agent to audit its own work against the plan before moving on.
The gate works because the agent already has the spec in context. It’s comparing what it built against what it was told to build. This catches two classes of problems: missed functionality (the spec said to validate input at boundaries, but the agent only validated on the happy path) and quality gaps (the spec required 80% coverage, but the agent only wrote happy-path tests).
Run the review gate after every phase, especially the ones that feel straightforward, that’s where complacency lives.
Step 6: Do Walk-throughs of All Your Screens and Update Specs
This step should perhaps be the first step of this whole process. Let me explain.
In a normal cycle of deciding what you want to build you have to spend some time thinking about and then writing down your requirements. Often, this happens in a simple document, bullet point lists etc. This is ok if your system is fairly simple to conceptualise but what happens if you want to build something a bit more complex? How will the AI actually know what you’re trying to accomplish?
Some people who I’ve spoken to say, “well, just talk to the AI”. Ok, true, talking to the AI one prompt after another kind of makes the approach iterative which is fine. But by doing so, you don’t really have a true picture of the entire system and more importantly because you don’t have the holistic view, you can’t make good architectural decisions or tradoffs.
Maybe there is a better way?
There is. Let’s say your system is a SaaS app with several screens with complex, non-trivial use case(s). Writing down a bunch of bullet points is probably not going to cut it. Instead try this:
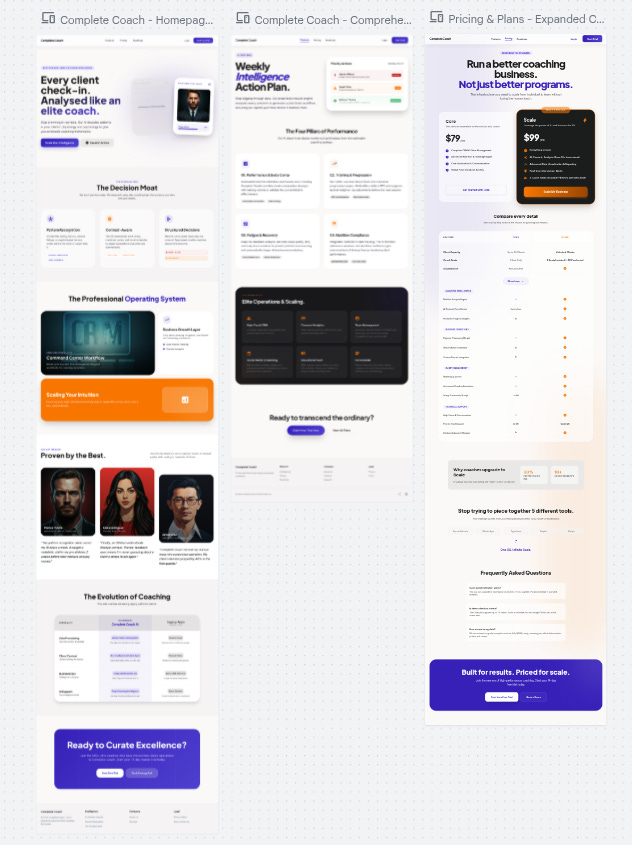
Actually design the UI before the AI agent starts building anything. You can easily use https://stitch.withgoogle.com or any other UI designer (e.g. www.figma.com) and design how the user interaction is meant to occur. Essentially convert your thinking process into a tangible look and feel so you can confirm your idea working. For example, how we did this design recently:
Once you’re happy with your UI prototype, do a complete walk-through with a speech-to-text recorder. Just talk to yourself or a friend as you walk through every screen, every component, button and text-box. Ask yourself, why is this here? What is it meant to do? What was the expected behaviour? How does this work?
Then, feed the exported UI prototype code and the walk-through transcript into your AI agent and say
"Read the UI code and the transcript and update all specs to ensure the system works as I expect. The transcript is your source of truth."
You’d be amazed how much better and quicker you can build complex, great looking and high quality apps using this approach.
I had a genuine “aha” moment when I finally put this in place for one of my projects.
Step 7: Build Your System Phase by Phase
This is where the phased delivery model pays off. You don’t type “build everything” and hope for the best. You build M0, verify it passes, then M1, verify it passes, and so on.
The harness enforces a natural cadence:
M0, Repo Activation: Initialise the project, install dependencies, set up CI, create the GitHub repo. No feature code yet. Just infrastructure.
M1, Foundation: Core data models, base API structure, auth middleware, database migrations. The smallest slice that compiles and runs.
M2, Product Core: Feature implementation. This is where the code-agent does the heavy lifting, guided by the planner’s phased breakdown. Each feature gets its own TDD cycle.
M3, Quality and Operations: Security hardening (the security-reviewer runs full OWASP Top 10), E2E tests (the e2e-runner covers critical user flows), monitoring, documentation. The polish phase.
Each phase is independently mergeable. If M1 passes but M2 has issues, you can ship M1 while you debug M2. This is not accidental, the planner profile explicitly requires that each phase can be delivered independently. Plans that require all phases to complete before anything works are rejected.
When you build phase by phase, debugging is tractable. If something breaks in M2, you know it wasn’t broken in M1 because M1 passed its review gate. The blast radius of any bug is bounded by the current phase.
Step 8: Test and Fix --> Test and Fix
This step isn’t a one-time action. It’s a loop. Run tests, find failures, fix them, run tests again. Repeat until green.
The harness gives you multiple testing layers:
Unit tests, Written by the TDD guide before implementation. Test individual functions and components. Target < 50ms per test. Mock only external dependencies (database, HTTP, file system). Never mock the thing being tested.
Integration tests, API endpoints, database operations, service interactions. Test that the pieces connect correctly.
E2E tests, Playwright tests covering critical user flows. Login, search, create, update, delete. The full journey.
Security scans, The security-reviewer runs automated checks for hardcoded secrets, vulnerable dependencies, SQL injection patterns, and sensitive data in logs. Then a manual OWASP Top 10 pass.
Verification loop, A six-phase check: build, type check, lint, test suite with coverage, security scan, diff review. The loop produces a structured report: BUILD PASS/FAIL, TYPES PASS/FAIL, LINT PASS/FAIL, TESTS X/Y passed with Z% coverage, SECURITY PASS/FAIL, X files changed, Overall: READY/NOT READY for PR.
The verification loop runs after every significant change. Not just at the end. After each phase, after each feature, after each refactor. It’s the safety net that catches regressions before they compound.
When tests fail, the harness has a specific flow: the build-error-resolver profile handles build failures, the code-agent fixes functional test failures, the security-reviewer addresses security findings. You’re not debugging alone, the right specialist is assigned by the lifecycle policy.
Keep looping until everything is green. Don’t move to the next phase with failing tests. That’s not discipline, that’s engineering.
Where This System Breaks
Nothing is perfect. Here’s where this approach falls down:
The agent can ignore the rules. The profiles and skills are instructions, not compiled constraints. A sufficiently confused or corner-cutting agent will violate its “What NOT to Do” list. The review gates catch most of this, but they’re not foolproof. You still need to read the code.
Context window pressure. Fourteen profiles, eighteen skills, working rules, and your entire build spec, that’s a lot of context. For long sessions, the strategic-compact skill helps by suggesting compaction at logical boundaries (after research, before implementation; after a milestone; before a context shift). But if you’re working on a massive codebase, you’ll feel the token pressure.
The 30-questions pattern can stall. If the agent asks thirty questions and you don’t know the answers, you’ll spend more time researching than building. This is actually a feature, not a bug, it means you’re designing before coding, but it can feel slow if you just want to see something working.
Multi-agent coordination is still emergent. The harness defines roles and routing, but it doesn’t have a central orchestrator that automatically spins up the security reviewer after the code agent finishes. You, the human, decide when to invoke which agent. The lifecycle policy suggests the right routing, but you drive the sequence.
The harness can’t fix bad requirements. If your build spec is vague, contradictory, or incomplete, no amount of review gates will save you. The 30-questions pattern helps surface ambiguities, but if you answer “I don’t know” to half of them, the spec will have holes that show up as bugs later.
None of these are reasons to skip the system. They’re reasons to understand its limits and apply it where it fits, production software that needs to work correctly, securely, and maintainably. For everything else, a solo coding agent is fine. Just don’t pretend the output is production-ready
The Complete Prompt Library
Initialise a New Project
Use this prompt right at the start of any new project. The assumption here is that the droid coding agent is being used. However, if something else is used, like codex or claude than that’s ok. The project structure will still work correctly.
cd ~/new-project-dir
droid
Read the repo in [https://github.com/MikeS071/ai-dev-harness] and follow all instructions to initialise a new project in [new-project-dir]. Ensure all dependencies are installed and are ready to use and remote github repo for this new project has been created and initialised. Once initialised, read the [new-project-dir] and learn all the instructions, skills, agent roles so all capabilities can be used to build this new project.Spec Out a New Feature or Project
Use this prompt to start designing a new feature or system. The harness knows the standards, structure and broad requirements based on good system design. By asking it to spec things out what we want is to create a production-ready build spec together with a reference-able checklist roadmap so the AI agent can execute when ready and you can keep track of where things are at during a multi-day development cycle.
You may also notice that there is a “Ask me upto 30 questions...” instruction at the end. That pattern is actually super important as it tells the AI to lock in 30 most critical assumptions - you’d be surprised how well this works in this scenario and can be used in other scenarios as it forces the AI to extrapolate on solution components that you may not have thought about. It’s like having a senior engineer sit side-by-side with you and giving you advice.
I want to design and spec out a new feature/system/solution called [feature-name]. Help me plan this out, design a comprehensive and production-ready build spec and also produce a checklist roadmap for all phases of the delivery. Ensure all standards, instructions and good-system design principles are followed. Ask me upto 30 most critical questions one by one to clarify anything that is still uncertain and needs to be locked-in before building starts.Add a Review Gate to Each Phase
Use this prompt to add a review gate for each phase of the build spec checklist. The idea here is to minimise hallucinations or issues with missed development of code. While AI Agents are great, they do miss things, so forcing a review of it’s own work actually improves your chances of getting a high quality, working solution. Use this prompt as a second pass over the build spec/checklist once it has been generated.
Add a review gate to each phase by adding this exact prompt to the end of each checklist/roadmap phase. Each phase cannot be called complete until the review gate has passed:
"Review the code developed in this phase and compare to the existing build specs. Identify any functionality gaps and if you find any material gaps then close them by building relevant code. Ensure no material gaps exist and that test coverage of 80% or higher. The phase cannot be called complete until the review gate is successfully passed."
Build the System
Once you have the production-ready build specs and checklist/roadmap, it is a simple matter of just saying “build it” to the AI Agent. I suggest you build the system phase by phase to manage complexity and to check that phases pass before moving on to the next section. This makes debugging or fixing issues a lot simpler.
Build Phase M0 (or M1 or M2 etc)